
1. Click on the company icon in the top right corner of the page: :

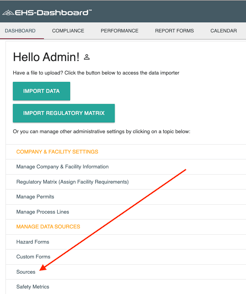
2. From the Admin menu, click "Sources" located under the "Manage Data Sources" section:
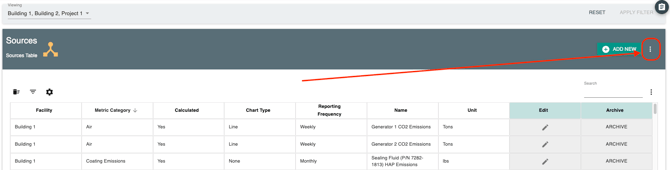
3. On the Sources page, find the + ADD NEW button near the top of the page.
Directly next to that button, click the three-dot menu. The three dots open a menu with additional options.
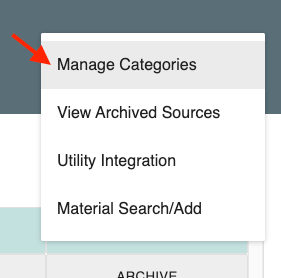
From the menu that opens, click Manage Categories and a side navigation panel will open.
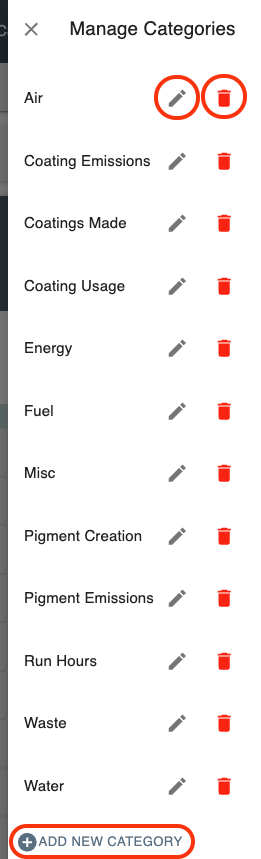
4. The side navigation panel is where you can manage your Metric Categories.
Choose one of the following actions:
Add a Category:
Use this option when you need to create a new category for organizing metrics. Enter the category name and save your changes.
Edit a Category:
Use this option when an existing category name needs to be updated. Select the category you want to change, click on the pencil icon, make your edits, and save your
Delete a Category:
Use this option when a category is no longer needed. Select the category you want to remove and choose the delete option.
Before deleting, confirm that the category is no longer being used or that removing it will not affect your metric organization.
Notes and Tips
-
Only delete categories that are no longer needed.
-
Use clear and consistent category names so metrics are easier to find.
-
If you are unsure whether a category should be deleted, rename it or confirm with your team before removing it.