Step 1: Navigate to Site Management
-
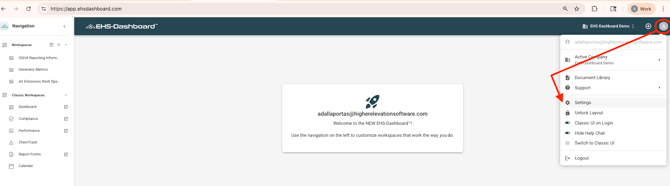
Click Account Settings in the upper right corner of the screen.
-
Click Settings.
3. Click General -> Manage Sites
 Step 2: Add or Manage Sites
From the Manage Sites view, you can:
-
Edit an existing site by clicking the pencil icon
-
Archive a site by clicking the archive icon
-
Add a new site by clicking the + ADD SITE button

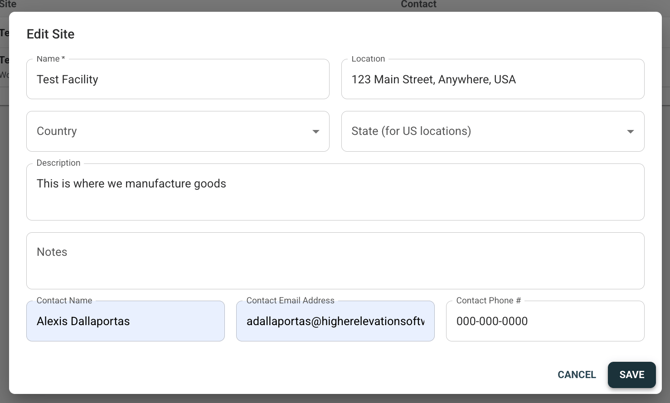
Step 3: Enter Site Details
In the Edit Site window, enter the following information:
-
Site Name (Required)
-
Location
-
Description
-
Notes
-
Contact Name
-
Email
-
Phone Number
Fill in as much detail as needed to properly identify and manage the Site.
Step 4: Save the Site
Click Save.
The new Site will now appear in your Site list and be available for use across the platform.
OutcomeA new Site has been added to your Free Trial Environment and can now be used to organize data, assign users, and support workflows within the EHS-Dashboard.