When to Use Event Triggers
Event triggers are useful when you want the system to:
• Automatically send notifications based on form submissions or status changes
• Generate related forms when criteria are met (ex: create a CAPA when an incident indicates corrective action is required)
• Update metric or material fields based on changes in another record
• Trigger tasks or reminders when data conditions are satisfied
• Drive downstream actions without human intervention
Triggers are based on conditions that evaluate user actions (e.g., saving or updating a form) or specific data values.
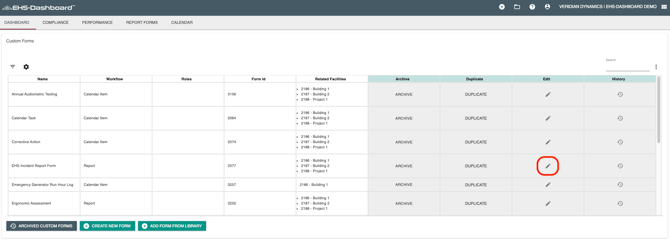
Step 1: Open the Form You Want to Add a Trigger To
-
Log into the EHS-Dashboard.
-
Navigate to Admin → Custom Forms.
-
Select the form you want to configure.
-
Click Edit.

Step 2: Add or Identify the Field You Will Use as a Trigger
-
Ensure the form has a field whose value will act as the basis for the trigger. Examples include:
Status dropdown (ex: Lock Applied → Back In Service)
Yes/No field (ex: Corrective Action Required?)
Numeric field (ex: Severity level) -
If the field does not exist yet, add it now.
Example fields to include:
Status
Corrective Action Required?
Metric or material data inputs
Review or approval flags

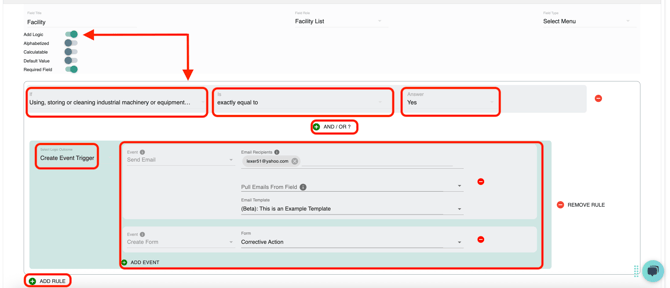
Step 3: Configure Field Logic and Trigger Actions
-
Select the field you want the trigger logic applied to.
(Important: If the trigger action is external to the form (ex: creating a related form, sending an email alert, or generating a task), the logic should be placed on the Facility field. If the logic is internal (ex: showing/hiding a field or requiring a field based on a response), the logic should be placed on the affected form field.) -
Open the field settings and navigate to the Logic / Trigger section.
-
Select the option to create a new trigger.
-
Define the condition that will activate the trigger.
Examples include:
If Status = Back In Service
If Corrective Action Required? = Yes
5. Configure the action that should occur when the condition is met.
Common trigger actions include:
Send email notifications
Generate related forms (ex: CAPAs)
Update form fields or metric/material data entries
Create tasks or reminders
Note: Field logic can support multiple conditions (AND/OR) to allow more advanced workflows.
Step 4: Save and Test Your Trigger
-
Click Save in the form builder.
-
Create or update a record that meets the trigger condition.
-
Confirm the correct action occurs (email sent, form generated, field updated, etc.).
Testing triggers is important to ensure workflows activate only when intended.
Important
-
When adding email addresses manually, type the address fully and press Enter to anchor it in the logic.
-
Once all event triggers are configured, scroll down and click Save and Exit.
Congratulations! You have successfully configured event triggers for your forms.